- [IoT 서비스] 모뎀을 이용한 기본기능 실습2021년 09월 15일
- 조별하
- 작성자
- 2021.09.15.:53

(2021/09/15 am 09:00)
어제는 REST API를 통해서 ae(디바이스) 생성, cnt(컨테이너) 생성, cin(데이터 입력) 생성 명령어를 주어서 Mobius 서버에 데이터를 전송하는 기본 기능을 실습해 보았다.
오늘을 모뎀과 PC를 연결하여 Wifi or 인터넷이 없다는 가정하에 모뎀에서 데이터를 Mobius에 데이터를 전송하는 기능을 실습할 예정이다.
1. Python Source
강사님이 알려주신 url 주소 : https://url.kr/w5n4ca
IoT서비스 개발을 위한 클라우드 플랫폼과 LPWA 네트워크 활용 - Google Drive
이 폴더에 파일이 없습니다.이 폴더에 파일을 추가하려면 로그인하세요.
drive.google.com
해당 주소에서 Python source를 다운로드하여 ae 생성, cnt 생성, cin 생성 등,
Postbox에서 Rest를 호출한 것과 동일하게 소스에서 설정 값을 바꾼 후 기본 기능들이 작동 확인.1) ae 생성
import json
import requests
from requests.exceptions import HTTPError
import shortuuid

serverIP = "192.168.0.220"

ae = "test_ae_create"
api = "0.0.1"

data = {
    "m2m:ae": {
        "rn":  ae,
        "api": api,
        "rr": False
    }
}

if __name__ == "__main__":
    headers = {
        "Accept": "application/json",
        "X-M2M-RI": "req" + shortuuid.ShortUUID().random(length=10),
        "X-M2M-Origin": "/S" + ae,
        "Content-Type": "application/json;ty=2"
    }

    try:
        response = requests.request("post",
                                    "http://" + serverIP + ":7579/Mobius?rcn=1",
                                    data=json.dumps(data),
                                    headers=headers,
                                    verify=False)

        print(response.text)

    except HTTPError as error:
        print(f"HTTP error occurred: {error}")
    except Exception as error:
        print(f"Other error occurred: {error}")
(serverIP : 내 ip 주소, ae : 디바이스 명, rr : 접근할 장비 유무, poa : 접근 장비 명)
- 내가 지정한 'test_ae_create'로 ae(디바이스) 생성을 Post box discovery로 확인해 보았다.2) cnt 생성
import json
import requests
from requests.exceptions import HTTPError
import shortuuid

serverIP = "192.168.0.220"

ae = "test_ae_create"
cnt = "cnt_create"
lbl = "findRoom1"

data = {
    "m2m:cnt": {
        "rn": cnt,
        "lbl": [lbl]
    }
}

if __name__ == "__main__":
    headers = {
        "Accept": "application/json",
        "X-M2M-RI": "req" + shortuuid.ShortUUID().random(length=10),
        "X-M2M-Origin": "/S" + ae,
        "Content-Type": "application/json;ty=3"
    }

    try:
        response = requests.request("post",
                                    "http://" + serverIP + ":7579/Mobius/" + ae + "?rcn=1",
                                    data=json.dumps(data),
                                    headers=headers,
                                    verify=False)

        print(response.text)

    except HTTPError as error:
        print(f"HTTP error occurred: {error}")
    except Exception as error:
        print(f"Other error occurred: {error}")
3) cin 생성
import json
import requests
from requests.exceptions import HTTPError
import shortuuid

serverIP = "192.168.0.220"

ae = "test_ae_create"
cnt = "cnt_create"
con = [{"nm" : "조정용","enm" : "jycho" }]

data = {
    "m2m:cin": {
        "con": con
    }
}

if __name__ == "__main__":
    headers = {
        "Accept": "application/json",
        "X-M2M-RI": "req" + shortuuid.ShortUUID().random(length=10),
        "X-M2M-Origin": "/S" + ae,
        "Content-Type": "application/json;ty=4"
    }

    try:
        response = requests.request("post",
                                    "http://" + serverIP + ":7579/Mobius/" + ae + "/" + cnt + "?rcn=1",
                                    data=json.dumps(data),
                                    headers=headers,
                                    verify=False)

        print(response.text)

    except HTTPError as error:
        print(f"HTTP error occurred: {error}")
    except Exception as error:
        print(f"Other error occurred: {error}")
4) PostBox에서 ae, cnt, cin 확인
생성한 ae에 대한 rn 명으로 조회 2. Simulator 사용
아직 Device에 대한 data를 받아서 Mobius에 넘겨줄 수 없기 때문에 제공되는 시뮬레이터를 이용하여 데이터 input/output을 확인하여 보자
시뮬레이터 url : https://github.com/IoTKETI/oneM2M-Device_Simulator
GitHub - IoTKETI/oneM2M-Device_Simulator
Contribute to IoTKETI/oneM2M-Device_Simulator development by creating an account on GitHub.
github.com
Mobius와 Simulator를 동시에 가동하기 위해서는 cmd창이 두 개가 실행되어야 하기 때문에
cenTOs에서는 Mobius를 windows에서는 cmd로 시뮬레이터를 구동시켜보자
1) Mobius 가동
root 입력 -> pwd 입력 -> #cd Mobius-2.5.6 -> node mobius.js

Centos에서 Mobius를 가동시켰을때 나오는 cmd이다. 2) Simulator 가동
'ssh root@'+내 ip 입력 -> pwd 입력 -> #firewall-cmd --permanent --zone=public --add-port=8369/tcp
->#firewall-cmd --reload -> #git clone https://github.com/IoTKETI/oneM2M-Device_Simulator -> #cd oneM2M-Device_Simulator -> npm install -> node app.js
위의 커맨드를 입력하여 시뮬레이터 다운로드 후 node app.js 까지 완료하였다면 해당 ip 주소와 port로 web 시뮬레이터에 들어갈 수 있을 것이다.
url : 내 ip주소 + :8369
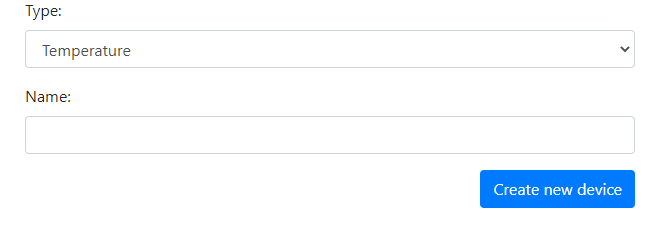
web으로 내ip주소와 포트번호로 접속 시 나오는 ui이다 - 온도 시뮬레이터 : 일정 시간마다 cin 생성시켜 랜덤으로 시뮬레이터의 온도를 변화시켜 준다.

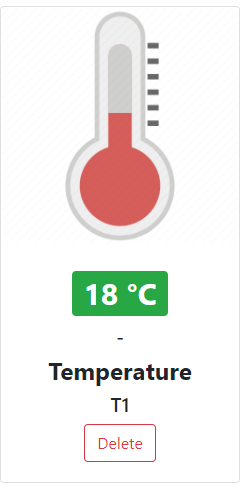
일정 시간이 지나면 온도 창에 찍히는 온도가 변하는 모습을 확인 할 수 있다.

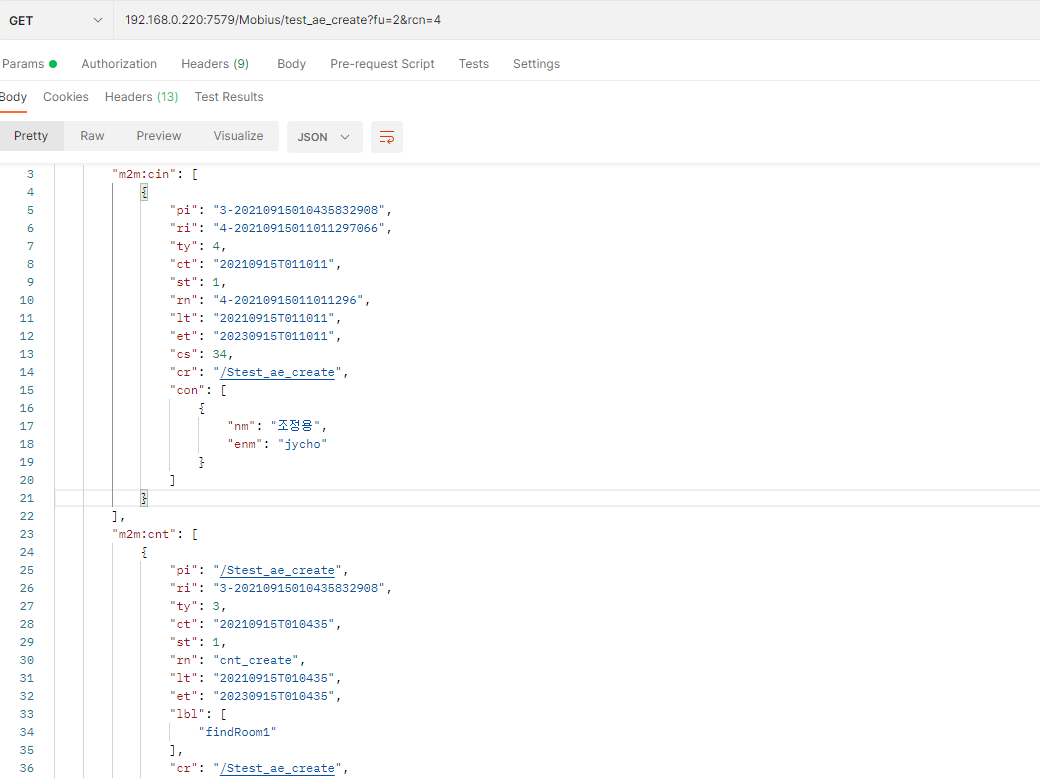
postman 에서도 일정시간이 지나면 cin이 생성되는 모습을 확인할 수 있다. Delete버튼 클릭 시 등록한 T1 디바이스와 Container, cin 데이터 모두 삭제
(Tree 구조이기 때문에 ae(디바이스)를 삭제하게 되면 하위 cnt와 cin 모두 삭제된다.)
- 램프 시뮬레이터 : 직접 입역 data or 소스를 실행시켜 Lamp 값을 변화시켜준다.


ae명을 lamp_ae로 생성시켜주었다. 램프는 ae생성 시 snt(COMMAND, DATA) 2개, cin 1개, sub(구독) 1개를 생성시킨다.
* sub : 구독이라고도 하며 cnt(컨테이너) 구독 시 해당 컨테이너에 값이 들어오면 인식하거나 반응을 주는 기능이다.
- 직접 입력 : 직업 update 하고 싶은 값을 입력하여 update 버튼 클릭 시 해당 값이 cin 되어 보이는 숫자 값이 수정
- sim 사용 : cin과 비슷하게 데이터를 입력할 수 있는 기능으로써 데이터 변환이 가능하다.
import json
import requests
from requests.exceptions import HTTPError
import shortuuid

serverIP = "192.168.0.220"

ae = "lamp_ae"
cnt = "COMMAND"
con = "1"

data = {
    "m2m:cin": {
        "con": con
    }
}

if __name__ == "__main__":
    headers = {
        "Accept": "application/json",
        "X-M2M-RI": "req" + shortuuid.ShortUUID().random(length=10),
        "X-M2M-Origin": "/S" + ae,
        "Content-Type": "application/json;ty=4"
    }

    try:
        response = requests.request("post",
                                    "http://" + serverIP + ":7579/Mobius/" + ae + "/" + cnt + "?rcn=1",
                                    data=json.dumps(data),
                                    headers=headers,
                                    verify=False)

        print(response.text)

    except HTTPError as error:
        print(f"HTTP error occurred: {error}")
    except Exception as error:
        print(f"Other error occurred: {error}")
3) 모뎀을 통한 MQTT 통신
모뎀을 PC에 연결하여 내 PC에서 외부 MQTT서버에 붙어있는 강사님의 Mobius에 요청을 보내보았다.
먼저 동일하게 강사님의 Mobius에 ae(디바이스)와 cnt(컨테이너)를 생성한 후 모뎀 python소스를 실행하여 커멘드를 입력해 보았다.
# -*-coding:utf-8-*-
import json
import os
import re
import serial
import sys
import threading
import shortuuid

############################################################
# 변경 가능
serverIP = "test.mosquitto.org"
serverPort = 1883
############################################################
ae = "jycho_ae_create"
container = "jycho_cnt_create"

clientID = shortuuid.ShortUUID().random(length=10)
topic = "/oneM2M/resp/" + ae + "/Mobius2/json"

ECHO = 0
QMTCFG = 1
QMTOPEN = 2
QMTCONN = 3
QMTCLOSE = 4
QMTSUB = 5
QMTPUB = 6

ATCommand = ECHO
pubData = ""

ATList = [
    "ATE0",
    "AT+QMTCFG=\"version\",0,4",
    "AT+QMTOPEN=0,\"" + serverIP + "\"," + str(serverPort),
    "AT+QMTCONN=0,\"" + clientID + "\"",
    "AT+QMTCLOSE=0",
    "AT+QMTSUB=0,1,\"" + topic + "\",0",
    "AT+QMTPUB=0,0,0,0,\"" + "/oneM2M/req/" + ae + "/Mobius2/json\""
]


def write(command):
    print(command)
    command = command + "\r"
    ser.write(command.encode("ascii"))


def UnsolicitedResultCode(data):
    global ATCommand

    rc = False

    if 0 == data.find("+"):
        rc = True

    if -1 != data.find("+QMTOPEN:"):
        if 0 == int(re.split(": |,", data)[2]):
            # +QMTOPEN: 0,0
            print("MQTT opened")

            # MQTT 클라이언트 접속
            ATCommand = QMTCONN

            # AT+QMTCONN
            write(ATList[ATCommand])
        else:
            # +QMTOPEN: 0,<result>

            # MQTT 서버 접속 실패에 따른 망 접속 종료
            os._exit(0)
    elif -1 != data.find("+QMTCONN:"):
        if 0 == int(re.split(": |,", data)[2]) and 0 == int(re.split(": |,", data)[3]):
            # +QMTCONN: 0,0,0
            print("MQTT connected")

            # 구독
            ATCommand = QMTSUB
        else:
            # +QMTCONN: 0,<result>,<return code>

            # MQTT 클라이언트 접속 실패에 따른 망 접속 종료
            ATCommand = QMTCLOSE

        # AT+QMTSUB
        # AT+QMTCLOSE
        write(ATList[ATCommand])
    elif -1 != data.find("+QMTSUB:"):
        if 0 == int(re.split(": |,", data)[3]):
            # +QMTSUB: 0,1,0,0
            sys.stdout.write("MQTT subscribed\r\n>")

            # 데이터 전송 가능
            ATCommand = QMTPUB
        else:
            # +QMTSUB: 0,1,<result>[,<value>]

            # MQTT 구독 실패에 따른 망 접속 종료
            ATCommand = QMTCLOSE
            write(ATList[ATCommand])
    elif -1 != data.find("+QMTPUB:"):
        if 0 == int(re.split(": |,", data)[3]):
            # +QMTPUB: 0,0,<result>
            print("MQTT published")
        else:
            print("MQTT pubilsh error")
    elif -1 != data.find("+QMTRECV:"):
        # subscribe topic
        # +QMTRECV: 0,0,"topic/example","This is the payload related to topic"
        response = json.loads(
            data[data.index(topic) + len(topic) + 3: len(data) - 1])

        if "pc" in response and "m2m:cin" in response["pc"] and "con" in response["pc"]["m2m:cin"]:
            sys.stdout.write(response["pc"]["m2m:cin"]["con"] + "\r\n>")
        else:
            print("message error")

    return rc


def ResultCode(data):
    global ATCommand

    if "OK" == data:
        if ECHO == ATCommand or QMTCFG == ATCommand:
            ATCommand = ATCommand + 1

            if QMTOPEN == ATCommand:
                print("Connecting " + serverIP + ":" + str(serverPort))

            # AT+QMTCFG
            # AT+QMTOPEN
            write(ATList[ATCommand])
        elif QMTCLOSE == ATCommand:
            os._exit(0)


def interruptThread():
    global ATCommand
    global pubData

    while True:
        # CR 제거
        pubData = sys.stdin.readline()[:-1]

        if "EXIT" == pubData:
            ATCommand = QMTCLOSE

            # AT+QMTCLOSE
            write(ATList[ATCommand])
        elif (0 == len(pubData)):
            sys.stdout.write(">")
        elif QMTPUB == ATCommand:
            # AT+QMTPUB
            write(ATList[ATCommand])


def readThread(ser):
    # ATE0
    write(ATList[ATCommand])

    line = ""

    while True:
        for c in ser.read():
            if QMTPUB == ATCommand and 62 == c:
                # publish topic message
                pub = json.dumps({
                    "m2m:rqp": {
                        "op": 1,
                        "fr": ae,
                        "to": "/Mobius/" + ae + "/" + container,
                        "rqi": shortuuid.ShortUUID().random(length=10),
                        "pc": {
                            "m2m:cin": {
                                "con": pubData
                            }
                        },
                        "ty": 4
                    }
                })
                # print(pub)
                ser.write(pub.encode("ascii"))
                command_variable = chr(26)
                ser.write(command_variable.encode('utf-8'))

                line = ""
                break
            elif 13 == c:
                # print(line)
                # URC 또는 result code 확인
                if (False == UnsolicitedResultCode(line)):
                    ResultCode(line)

                line = ""
                break
            elif 10 != c:
                # 시리얼 데이터 저장
                line = line + chr(c)


if __name__ == "__main__":
    print("Enter \"EXIT\" to exit.")

    ser = serial.Serial("COM11")

    interrupt = threading.Thread(target=interruptThread)
    interrupt.start()

    read = threading.Thread(target=readThread, args=(ser,))
    read.start()
* 강사님이 MQTT서버 연결을 끊는 바람에 캡처를 하지 못했지만ㅜㅜ 강사님의 Mobius를 통해 내가 요청한 cin이 처리되는 걸 확인하였다.
20210915_1-20210915T001836Z-001.zip0.00MB20210915_2-20210915T020901Z-001.zip0.00MB위에 url을 첨부하여 따로 다운로드할 수 있지만 여기서 다운로드해라.
'EDUCATION > IoT 서비스' 카테고리의 다른 글
[IoT 서비스] 기본기능 실습 (0) 2021.09.14 다음글이전글이전 글이 없습니다.댓글